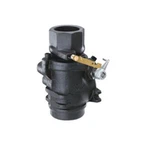
Steps for Pressure Test of Loading Arms
The pressure resistance of loading arms can only be determined through specific tests. A product with strong pressure resistance typically offers high efficiency. What are the main procedures for the pressure test? The steps are as follows:

Pressure Test Procedures
Tool Inspection and Approval:
Ensure all test tools are complete. The pressure test can be conducted only after obtaining approval from the safety management personnel and technical supervisor of the vinyl chloride refilling station. If inspectors from the Quality and Technical Supervision Bureau are present, their consent is mandatory before starting the test.
System Connection and Safety Protection:
Before the pressure test, connect the test equipment to the loading/unloading pipe according to the specified pressure test process. Implement safety protection measures as required, ensuring all sealed parts are fully assembled and fastened with bolts, and close the nitrogen purge ball valve on the loading arm.
Temperature Control and Gas Discharge:
Confirm that the ambient temperature is >15°C. Fill the system with the test liquid, rotate the loading arm to maintain a certain slope, ensure the quick connector faces upward, and discharge all gas from the quick connector at the end of the loading arm to eliminate air in the pipe.
Liquid Filling and Plug Connection:
Stop filling the test liquid when the quick connector of the liquid loading arm is fully filled with water, and connect the pressure-bearing plug to the quick connector. Note: The quick connector must not be directed at personnel or equipment to prevent injuries or damage from the plug flying off if the connector detaches.
Surface Dryness Maintenance:
Keep the loading arm surface dry during the test to prevent temperature reduction caused by water evaporation.
Temperature Equilibration and Pressurization:
After the arm temperature matches the water temperature, start the pressure test pump to continue filling the loading/unloading pipe with the test liquid.
Operation Supervision:
During liquid filling, have two personnel supervise while one operates to avoid exceeding the test pressure and damaging the loading arm.
Pressure Regulation and Inspection:
Increase the pressure gradually. When the design pressure is reached, confirm no leakage before continuing to raise the pressure to the specified test pressure. Maintain the pressure for 30 minutes without drop, then reduce the pressure to 0.8 times the test pressure and hold for 1 hour. During this period, conduct a comprehensive inspection of the loading arm: no leakage and stable pressure indicate passing the test. Do not use the test pump to maintain pressure during the hold period. In case of leakage, release the pressure before repairs; never tighten bolts under pressure or apply external force to pressurized components, and never disassemble the pressure-bearing plug from the quick connector while the arm is under pressure.
Post-Test Drainage and Drying:
After the hydrostatic test, promptly drain all water from the loading/unloading pipe and blow-dry the surface with compressed air.
The above are the pressure test steps for loading arms. During the test, continuously check for leaks and conduct thorough inspections to ensure accurate test results.